This article explains what products are in Tryon and walks you through the steps to add a garment to the platform so it becomes available for virtual try-on.
What is a product in Tryon?
A product is a garment registered on the platform. Each product has the original photo of the garment and an AI-generated template — a version of the garment ready to be overlaid on the customer's body during the virtual try-on.
There are two product types:
- Manual — Registered directly through the dashboard. It does not appear automatically on e-commerce pages; you control where and when to display it.
- E-commerce — Linked to specific URLs on your store. The Tryon widget displays it automatically whenever a visitor accesses those pages.
Before you start
Prepare the garment photo paying attention to the following requirements:
- Accepted formats: PNG, JPEG / JPG, WEBP
- Maximum size: 50 MB
- Content: the AI needs to identify at least one garment in the image. Photos with a clean background and good lighting produce the best results.
Step-by-step: how to register a product
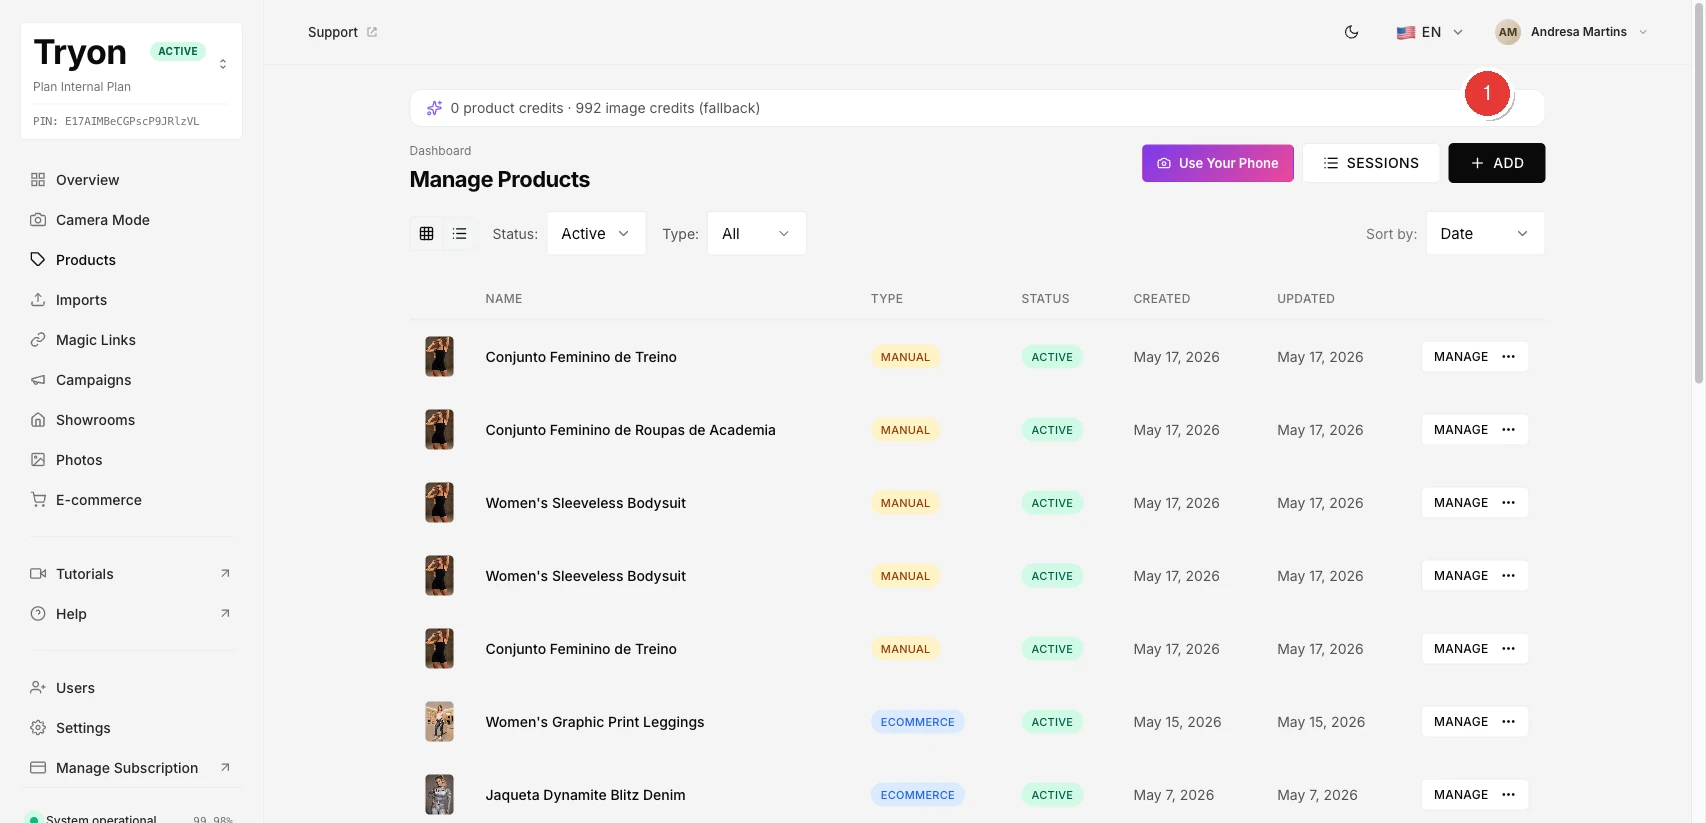
1 Go to the product list and click Add Product
In the left sidebar, click Products. The screen shows all registered products. Click the Add Product button to start the registration.
2 Upload the garment photo
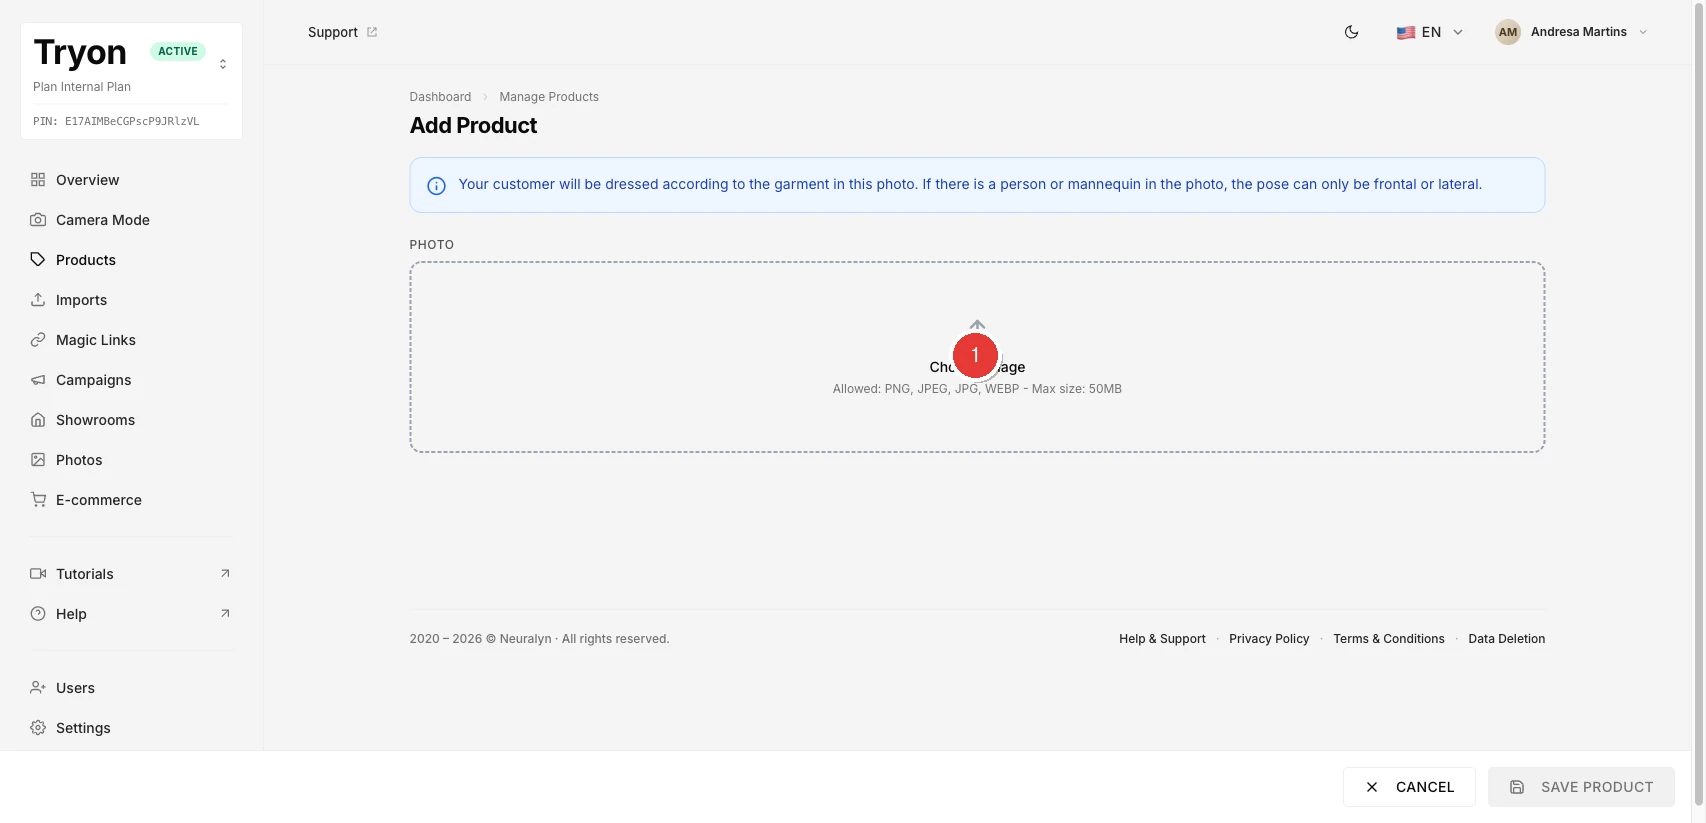
On the add product screen, click the upload area (or drag and drop the file) to upload the garment photo. Wait while the AI automatically analyses the image and fills in the information it can identify.
3 Review the AI suggestions and complete the form
After analysis, the AI automatically fills in the name and detects the garments in the photo. Review and adjust as needed:
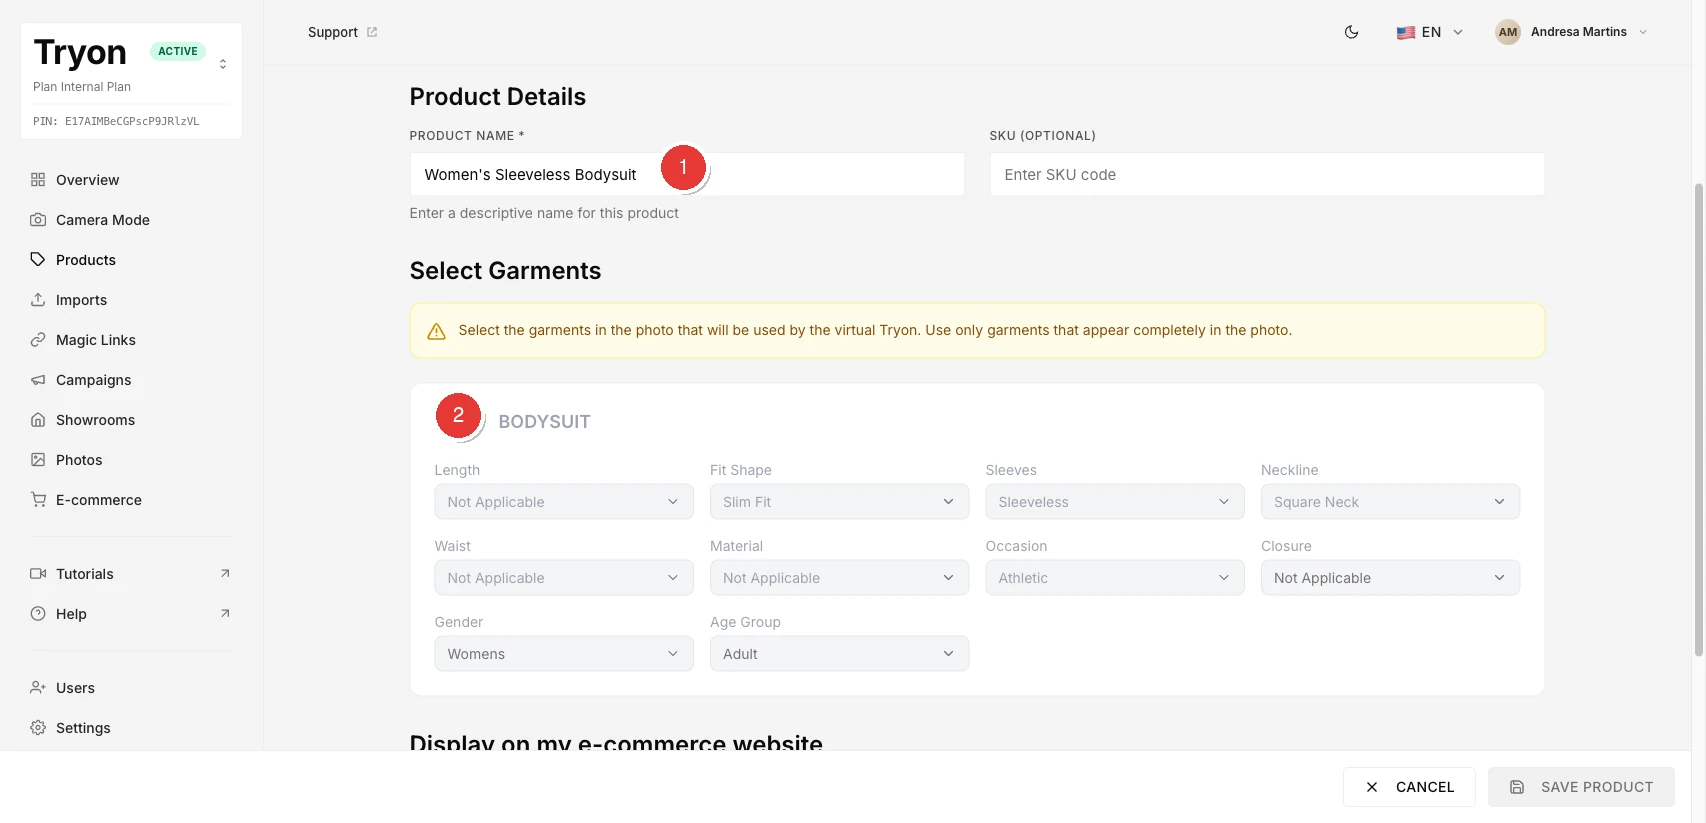
- Product name (required) — minimum 3 characters to enable saving.
- SKU (optional) — internal code of the garment in your inventory management.
- Detected garments — check the garments you want to associate with this product.
4 Choose whether the product should appear in the e-commerce
Indicate whether this product will be displayed automatically in your store's widget:
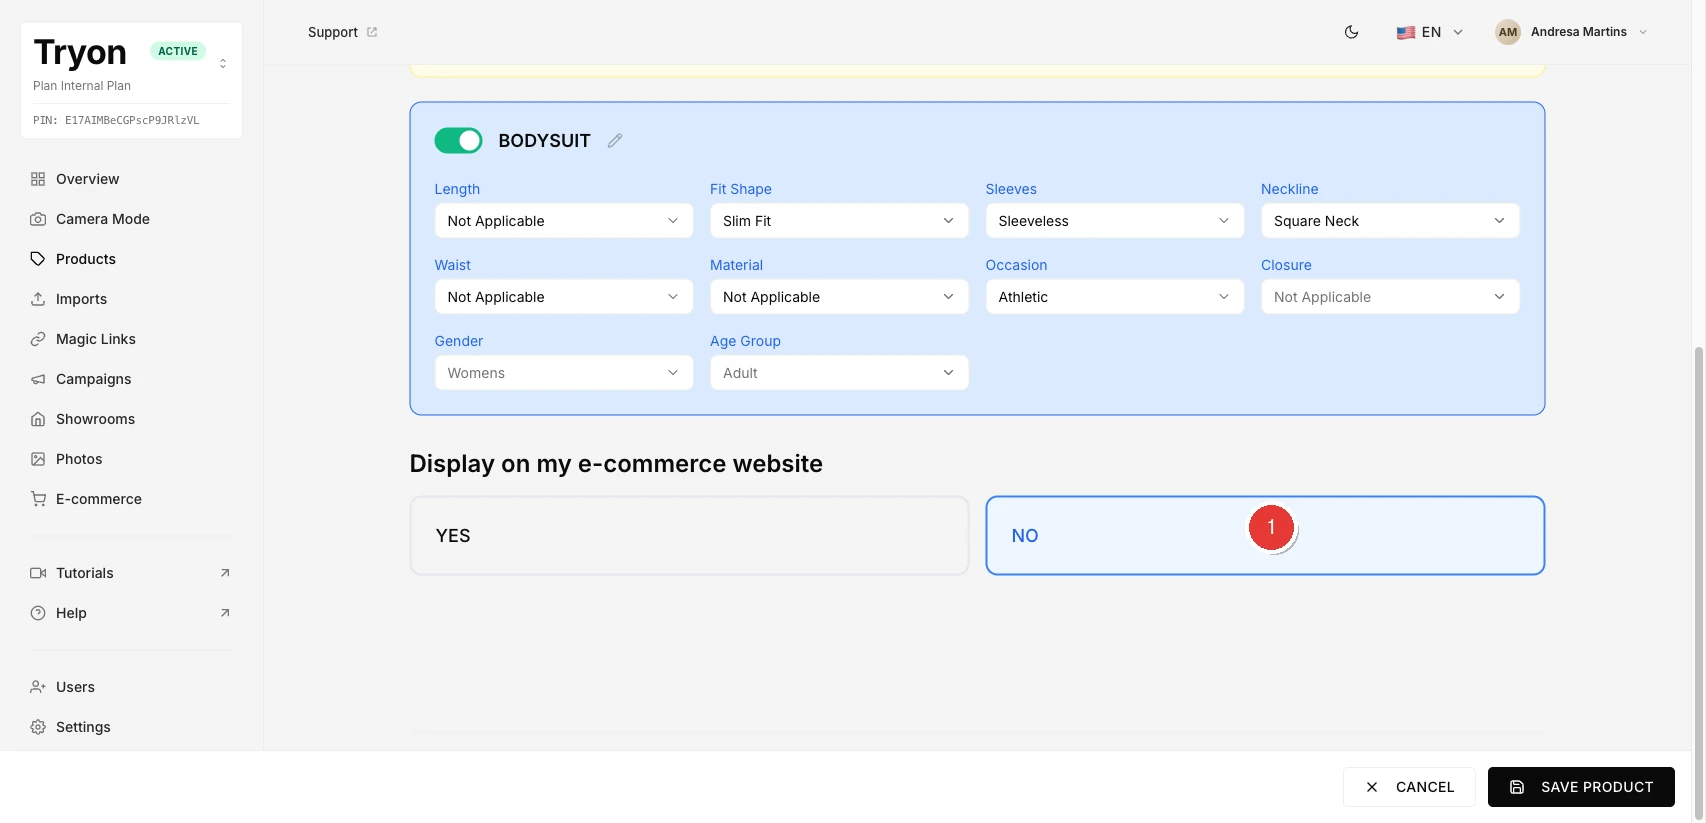
- No — the product is available only in the dashboard (manual type).
- Yes — enter the URLs of the pages where the product should appear.
5 Click Save Product and select the pose
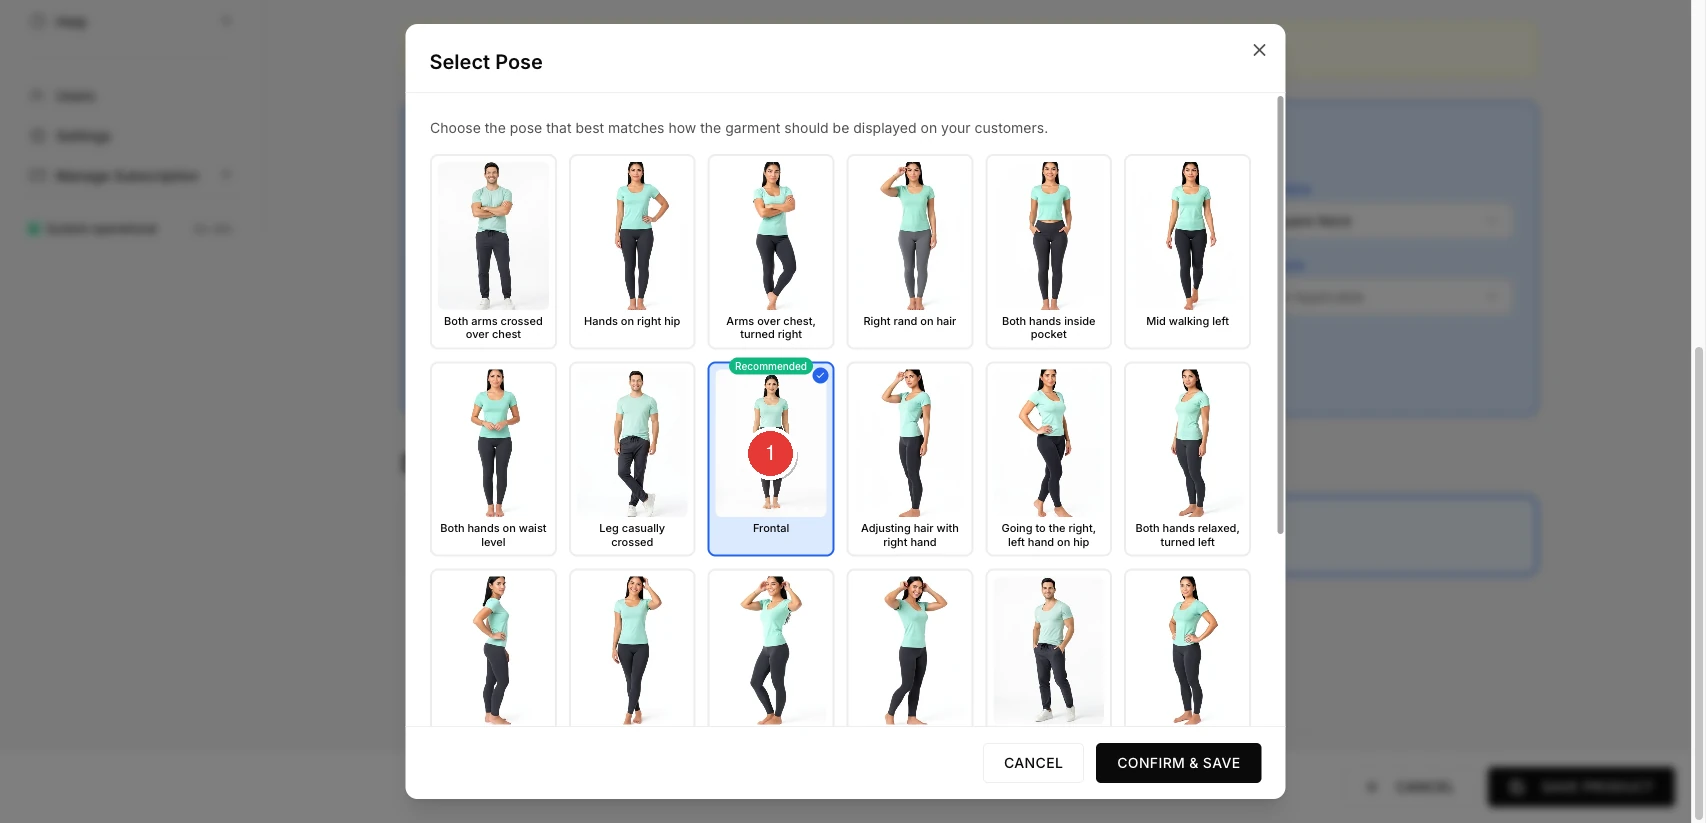
Clicking Save Product opens a pose selection modal. Select the option that best matches the submitted photo and click Confirm and Save.
6 Wait for template generation and check the result
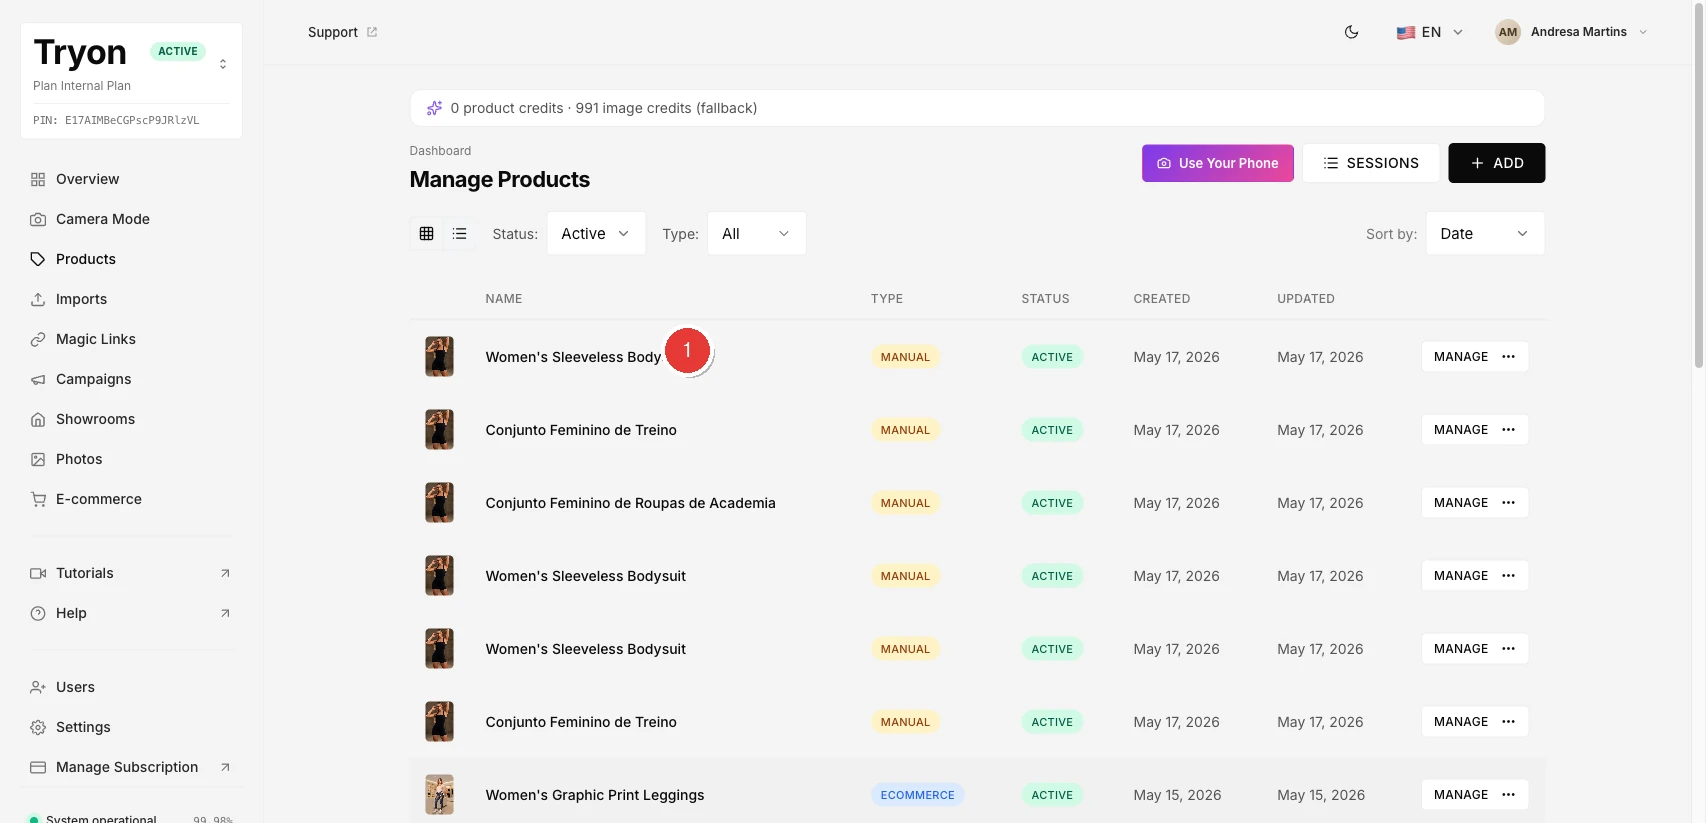
The AI generates the garment template from the photo and the provided information. When complete, the product appears in the list with status Active and is ready for virtual try-on.
Credit consumption
Each product created consumes 1 product credit. If product credits are exhausted, the system automatically attempts to use 1 image credit as an alternative. If both are zero, registration is blocked.
Common error messages
| Message / situation | What happened | What to do |
|---|---|---|
| Invalid file type | The uploaded file is not PNG, JPEG, JPG, or WEBP. | Convert the image to one of the accepted formats and try again. |
| File too large | The image exceeds 50 MB. | Reduce the file size and upload again. |
| Multiple people detected in the image | The AI found more than one person in the photo. | Use an image with only one person. |
| Could not detect person from the back | The pose is not supported for analysis. | Submit a front-facing or side-facing photo. |
| No garment detected | The AI did not identify clothing in the image. | Use a photo that clearly shows the garment. |
| Failed to analyse image | Temporary error during analysis. | Wait a moment and try again. |
| Credit limit reached | Both product and image credits are exhausted. | Check your plan or contact support to add credits. |
Questions?
If you encounter any difficulty not covered by this article, contact our support team.